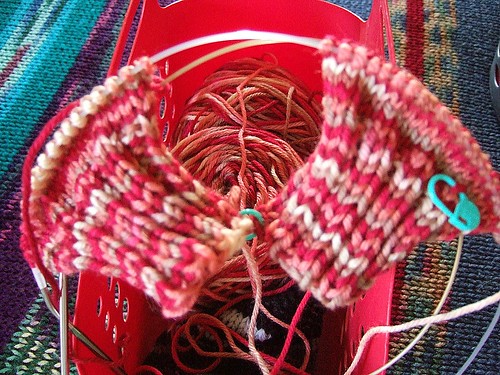
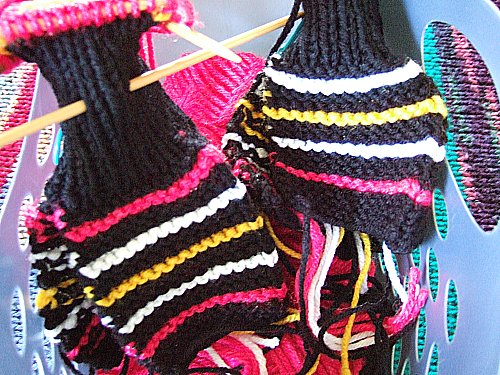
Step 6
Last instructions were to knit 16 rows of stockinette stitch for the body of the mitten.
Next you will begin decreasing for the mitten tip.
Decrease for mitten top:
1. (k6, k2tog) 4x – 28 sts
2. Knit
3. (k5, k2tog) 4x – 24 sts
4. Knit
5. (k4, k2tog) 4x – 20 sts
6. Knit
7. (k3, k2tog) 4x – 16 sts
8. Knit
9. (k2, k2tog) 4x – 12 sts
10. Purl 2tog across – 6 sts, break yarn, gather up.
This is the almost finished mitten that just needs seaming up.
And that's all for the LEFT mitten.
The RIGHT mitten is about the same, the only difference is the shaping of the thumb gusset.
For those of you who want to jump ahead, here are the instructions for the RIGHT mitten - no pics, yet. I'll be back with those pics as soon as I get to that point in my knitting.
Right Mitten:
Cast on 32 sts and rib for 22 rows
Knit 4 rows in St st Increasing by 1 on first row. 33 sts
Begin Right Thumb Gusset:
Row1: K29, PM, M1, Knit to end of round – 34 sts
Row 2: Purl to marker, M1, slip marker, p to end of row.
Rows 3-11: Repeat last 2 rows 4 times more.
Keep increasing every row until 44 total stitches.
Next Row: Purl 28 sts, (remove marker) turn and work the next 13 sts for thumb as in left mitten.
Mitten Body & Mitten Tip: Same as in left mitten.
Sunday, July 12, 2009
Saturday, July 04, 2009
Mitten Tutorial - Step 5
Hope no one abandoned their mittens!
Step 4 (continued):
After you knit your 12 thumb rows your mitten should look like the pictured below.
Step 5:
Next Row: K3, k2tog across row 8 (12)sts,
turn purl back.
Then knit 2tog across – 4 (6)sts.
Break yarn leaving a 1 yard length, gather up thumb tip and seam up thumb.
Picture below is the thumb already sewn up.
Now I'll show you how I avoid a hole at the "crotch" of the thumb.
With the wrong side facing you go thru the left stitch purl bump and
then go thru the right stitch purl bump.
After you've done that, purl to the end of the row (going to the left)
On the right side knit 15 sts and pick up one stitch at the "crotch".
and knit to the end of the row.
Don't forget to mark this row.
You now have 32 sts on the needle and you are ready to knit the body of the mitten.
Knit for 16 rows for body of mitten.
Monday, June 29, 2009
Mitten Tutorial - Step 4
Is everyone still with me?
I thought I'd give you a few days to complete step 3.
Step 4:
After you have 44 total stitches your mitten should look like this
And you just finished a knit row.
Next Purl Row - Purl 29 sts and turn. Don't purl past the marker.
This is what it looks like after you turn
Now you are ready to knit the thumb.
Thumb: Edited July 4th - changed # of rows to 12
Knit 13 sts, marking this row as row 1 and knit 12 total rows on these 13 sts.
This is the beginning of the thumb part with a marker.
Any questions?
Saturday, June 27, 2009
Mitten Tutorial - Step 3
Now we will begin the left thumb gusset
Row 1: Knit 4, M1 (make one), PM (place a marker), knit to end of row.
Above picture shows how I M1 (make 1). I lift the stitch with the left needle and knit into the back of it so as not to leave a hole.
Knitting in the front and back of the stitch to increase does not work - it does not leave a smooth increase line and does not look quite as nice.
Above picture is the first row knit to the end with the marker in position.
You can see I have 5 sts at the right because I M1 and 29 sts on the left.
Row 2: Purl to marker, slip marker and m1.
To make one on the purl side, lift the stitch as above and
come in from behind to purl this stitch. We don't knit it because we do not want any purl bumps on the right side. It's a wee bit tricky but there are only a few more rows of this type of increase.
Rows 3-11: Repeat last 2 rows 4 times more.
Keep increasing every row until 44 (50) total stitches
You should end up with 15 sts on the right side of the marker and 29 sts on the left side.
Let me know if you get stuck anywhere and I'll see if I can better explain.
Or if I miscalculated the row counts.
Mostly it is the number of stitches at the end that matter.
Friday, June 26, 2009
Mitten Tutorial - Step 2
Step 2 is easy, but first I have to clarify some questions.
We will be using the same size needles for knitting the whole mitten.
I also forgot to mention that due to the shaping of this gusset we will be making a left and a right mitten.
We are working on the LEFT mitten for now.
So on to Step 2
Knit 4 rows in Stockinette stitch, but INCREASE by 1 st in the first row.
you will now have 33 sts on the needle.
Update for "kittie" noreply-comment@blogger.com"
Kittie asks about my preferred method of increasing. I don't have a preferred method - I use whatever one works with the pattern.
In this instance for increasing by one, I knit 16 sts and then lifted the stitch from the bottom of the next stitch and knit into that and then knit the top stitch.
Here is an example on Maggie's Rags Site.
Thanks for asking this question Kittie!
I increased in the center. This is the section that one may knit more rows if they like longer mittens but since these are for children we will keep it at 4 rows.
See I told you Step 2 was easy!
Tomorrow Step 3.
Thursday, June 25, 2009
Mitten Tutorial - Step 1
Are you ready? Well here goes - my very first mitten tutorial!
We'll be working on just the small size for now - I'll add the next size up on the actual pattern.
Step 1
Cast on 32 sts and knit in rib of your choice for 3 1/4"
I like 2x2 rib, so I used that - does not matter what you choose.
3 1/4" for me worked out to about 22 rows.
Tomorrow I'll post the next step.
Can't think of a name for this pattern - they're nameless right now!
Wednesday, June 24, 2009
Mitten Time
Okay, so I'm on a roll of mitten knitting!
The lovely blue yarn is Ironstone Multi 95% Wool 5% Polyester
These are worked on double points in the round.
Same Ironstone yarn here but these are knit on 2 needles.
Mitten Tutorial
I'll be posting a step by step little tutorial on how to knit these mittens with the "Indian thumb gusset " on 2 needles.
What you need is worsted wt yarn - light or medium wt worsted will work.
I think a little over 100 yds will work as I was able to squeeze out 3 pairs from one ball of Ironstone.
My gauge was 5 sts to 1 inch - use whatever needles give you that gauge.
Yes you should knit up a swatch, unless you already know your gauge with worsteds. I do ;)
I'll post step 1 tomorrow and after I'm done with all the steps I'll be posting the pattern over on my pattern blog.
And for those of you who hate to seam and would rather make your mittens in the round - stay tuned for that pattern.
Pairs 13, 14 & 15
The lovely blue yarn is Ironstone Multi 95% Wool 5% Polyester
These are worked on double points in the round.
Pairs 16, 17 & 18
Same Ironstone yarn here but these are knit on 2 needles.
Mitten Tutorial
I'll be posting a step by step little tutorial on how to knit these mittens with the "Indian thumb gusset " on 2 needles.
What you need is worsted wt yarn - light or medium wt worsted will work.
I think a little over 100 yds will work as I was able to squeeze out 3 pairs from one ball of Ironstone.
My gauge was 5 sts to 1 inch - use whatever needles give you that gauge.
Yes you should knit up a swatch, unless you already know your gauge with worsteds. I do ;)
I'll post step 1 tomorrow and after I'm done with all the steps I'll be posting the pattern over on my pattern blog.
And for those of you who hate to seam and would rather make your mittens in the round - stay tuned for that pattern.
Monday, April 20, 2009
Mitten Factory
Here is another pair of "hoot-less" mittens. I followed the pattern of Give-A-Hoot mittens omitting the cabled parts.
Close up of what the Finnish knitters call "Indian Thumb Gusset"
I did not really care for the 34 sts width of these. A little too wide even for my wide hands. I assume when you work the cabled part it would draw in the hand for a tighter fit.
Soooo.............
Inspired by Give-A-Hoot mittens I came up with these "Life Line" mittens.
I cut down the pattern to 32 sts wrist and body.
About 2-3 oz of worsted wt yarn and based on 32 sts for a snugger fit.
I'm calling them Life Line Mittens because the thumb gusset curves along the life line on your palm.
Recipe/Mods for Life Line Mittens
Inspired by Give-A-Hoot Mittens
About 2.5 – 3 oz of worsted wt yarn and needles to give you a gauge of 4 – 4 ½ sts per inch.
CO 32 sts, join in round and knit ribbing of our choice for 3.5”
Knit 4 rows in stockinette stitch.
Left Thumb Gusset
Rnd 1: K3, kfb next st, PM (place marker) K to end of row (33sts)
Rnds 2-9: Knit to 1 stitch before marker, kfb of that stitch, slip marker and knit to end of round.
You should end of with 41 total stitches.
Next row; Knit 13, place next 11 sts on a holder, cast on 2 sts on right hand needle and knit to end of round. (32 sts)
Knit until top of mitten just clears your little finger. This was about 5” from the base of my palm or from the beginning of the stockinette part. I have short fingers, so you might want to knit more rows for longer fingers.
Mitten Top
1. (K2tog, K6) 4x – 28 sts
2. Knit this row and every even row.
3. (K2tog, K5) 4x – 24 sts
5. (K2tog, K4) 4x – 20 sts
7: (K2tog, K3) 4x – 16 sts
9: (K2 tog, K2) 4x – 12 sts
10: K2 tog across, break yarn, gather up
Thumb
From holder, pick up and knit 11 sts for thumb, 1 st in the corners and 2 sts at the base of thumb. (15 sts)
*On next round decrease at the corners so there are 13 sts total for thumb.
Divide on 3 needles and knit even about 2”.
Last row; knit 2 together across, break yarn and gather up.
Right Thumb Gusset
Rnd 1: K11, PM, kfb next st, K to end of row (33sts)
Rnds 2-9: Knit to marker, slip marker, kfb of next stitch, knit to end of round.
You should end of with 41 total stitches.
Next row; Place next 11 sts on a holder, cast on 2 sts on right hand needle and knit to end of round. (32 sts)
Knit body same as left hand mitten.
What's Next?
Having met puzzled out the new thumb gusset on one strand mittens, I've moved on to modifying my favorite 2 strand mitten pattern.
#9 needles and 2 strands of knitting worsted
Thumb hole might be too large, I won't know yet until I work it.
Stay tuned!
Close up of what the Finnish knitters call "Indian Thumb Gusset"
I did not really care for the 34 sts width of these. A little too wide even for my wide hands. I assume when you work the cabled part it would draw in the hand for a tighter fit.
Soooo.............
Inspired by Give-A-Hoot mittens I came up with these "Life Line" mittens.
I cut down the pattern to 32 sts wrist and body.
About 2-3 oz of worsted wt yarn and based on 32 sts for a snugger fit.
I'm calling them Life Line Mittens because the thumb gusset curves along the life line on your palm.
Recipe/Mods for Life Line Mittens
Inspired by Give-A-Hoot Mittens
About 2.5 – 3 oz of worsted wt yarn and needles to give you a gauge of 4 – 4 ½ sts per inch.
CO 32 sts, join in round and knit ribbing of our choice for 3.5”
Knit 4 rows in stockinette stitch.
Left Thumb Gusset
Rnd 1: K3, kfb next st, PM (place marker) K to end of row (33sts)
Rnds 2-9: Knit to 1 stitch before marker, kfb of that stitch, slip marker and knit to end of round.
You should end of with 41 total stitches.
Next row; Knit 13, place next 11 sts on a holder, cast on 2 sts on right hand needle and knit to end of round. (32 sts)
Knit until top of mitten just clears your little finger. This was about 5” from the base of my palm or from the beginning of the stockinette part. I have short fingers, so you might want to knit more rows for longer fingers.
Mitten Top
1. (K2tog, K6) 4x – 28 sts
2. Knit this row and every even row.
3. (K2tog, K5) 4x – 24 sts
5. (K2tog, K4) 4x – 20 sts
7: (K2tog, K3) 4x – 16 sts
9: (K2 tog, K2) 4x – 12 sts
10: K2 tog across, break yarn, gather up
Thumb
From holder, pick up and knit 11 sts for thumb, 1 st in the corners and 2 sts at the base of thumb. (15 sts)
*On next round decrease at the corners so there are 13 sts total for thumb.
Divide on 3 needles and knit even about 2”.
Last row; knit 2 together across, break yarn and gather up.
Right Thumb Gusset
Rnd 1: K11, PM, kfb next st, K to end of row (33sts)
Rnds 2-9: Knit to marker, slip marker, kfb of next stitch, knit to end of round.
You should end of with 41 total stitches.
Next row; Place next 11 sts on a holder, cast on 2 sts on right hand needle and knit to end of round. (32 sts)
Knit body same as left hand mitten.
What's Next?
Having met puzzled out the new thumb gusset on one strand mittens, I've moved on to modifying my favorite 2 strand mitten pattern.
Red Rocks Mittens
#9 needles and 2 strands of knitting worsted
Thumb hole might be too large, I won't know yet until I work it.
Stay tuned!
Tuesday, April 14, 2009
Half Hexagons
I decided to "fill in the gaps" and make some half hexies for the sides.
I Googled around and looked at Ravelry hexagons, but could not find any thing that would work.
No Pictures available - somehow they disappeared from Flickr
Only one available is on Ravelry
http://www.ravelry.com/projects/KnittingNonni/hexagon-how-to
This is how I made up the half hexie.
R1: 8 dc in a ring (however way you want to make the ring, I did a magic loop) Break yarn. DO NOT TURN
R2: Ch4, (2dc cluster in next DC, ch1) repeat 5x, ch1, dc in last dc. Break yarn do not turn.
R3: Ch3, dc in ch1 space, (ch1, 3dc’s in next ch 1 space) 5x, ch1, dc in ch1 space, dc in last dc. Break yarn.
R4: TURN hex motif to wrong side and start this row with a sc, ch2, (sc, ch3) 5x, ch2, sc in last stitch, TURN
R5: Ch4, 3dc in ch2 space, (3dc in next ch3 space, 3dc, ch2, 3dc in next ch 3 space) 2x, 3dc in next ch3 space, 3 dc in last ch2 space, dc in last dc.
Hopefully I typed this out right, but if in doubt you should look at the pictures.
Since I did not take a pic of the last row on the 2nd attempt, I do not have a model to go by. It fit so well I did not want to take if off the blanket ;)
So there might be an error on the last row - let me know :)
Which ever way you choose to make your half hexies fit is probably ok as long as they look good on your blanket!
Tuesday, October 14, 2008
Hold On To Your Hats!
It's very windy here in Fontana, and fall has arrived in the Inland Empire.
We're having gusts of about 49 mph and that makes it pretty darn hard to go outside and pull weeds. I hope they die down soon because we are in need of a few groceries.
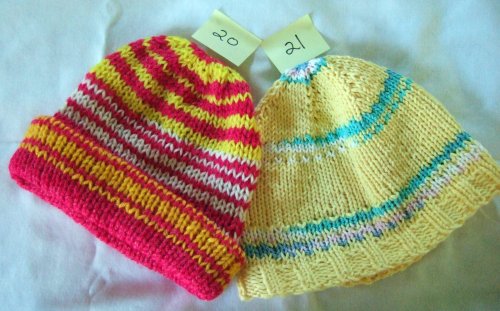
Meanwhile I've been busily knitting up more Hatz!
Four of them are just a basic beanie - no pattern. I used up lots of little oddballs of chunky type yarn, like Lion Brand Jiffy.
# 26 is two strands of knitting worsted started from the top down with a 2.5" garter stitch brim. Nice and warm around the ears.
#28 is the RAD Hat knit with bulky yarn, and several oddballs of Lion Brand Jiffy.
Still working on the Juliet Cardi, Sally Melville Vest, Squarz and blankets.
We're having gusts of about 49 mph and that makes it pretty darn hard to go outside and pull weeds. I hope they die down soon because we are in need of a few groceries.
Meanwhile I've been busily knitting up more Hatz!
Hatz 26 - 30
Four of them are just a basic beanie - no pattern. I used up lots of little oddballs of chunky type yarn, like Lion Brand Jiffy.
# 26 is two strands of knitting worsted started from the top down with a 2.5" garter stitch brim. Nice and warm around the ears.
#28 is the RAD Hat knit with bulky yarn, and several oddballs of Lion Brand Jiffy.
Still working on the Juliet Cardi, Sally Melville Vest, Squarz and blankets.
Saturday, October 11, 2008
Discovery
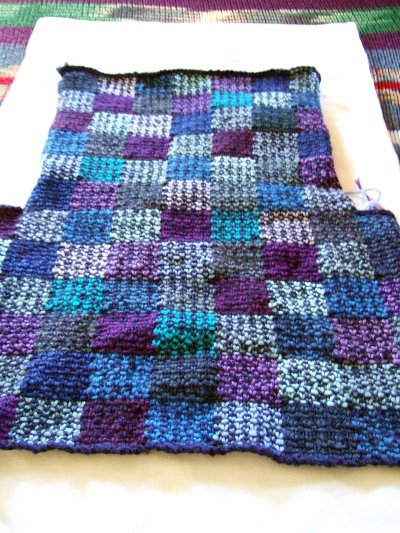
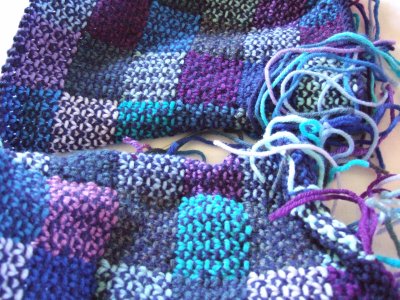
It's fun to go digging in one's hidden Wips. Look what I discovered!
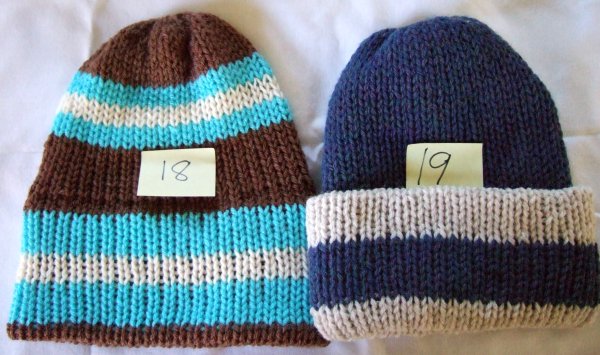
It is a vest from Sally Melville's Styles book; The Whistler Vest.
This one was hanging out deep in my closet with some other forgotten projects.
We were discussing what to make for the elders of the Rez and vests were mentioned. I think this one will be going up to South Dakota this winter.
These are the two fronts and they are already up to the armholes, so I really do not have much more to knit. It's a simple linen stitch knit on #5 needles.
Friday, October 03, 2008
Mitten Challenge Totals & More
The totals for the Mittenz Challenge of 2008 are in!
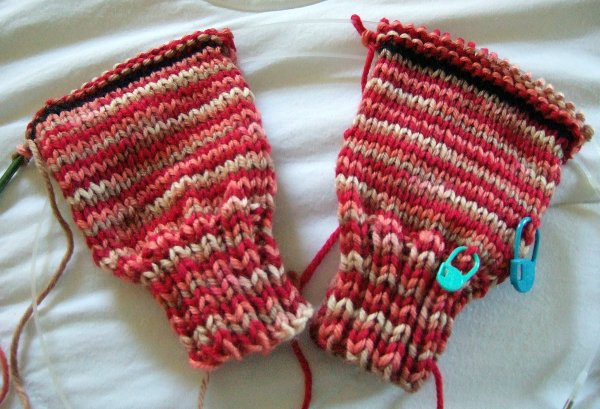
1003 pairs of mittens/gloves/wristers were were mailed last week to the Rez!
Simply amazing, isn't it? What one group of people can do when called to the challenge!
Now back to our regular programming.... digging out the WIPs
Found two more hats in the WIP pile.
It's a Ravelry Download too. $5
Since this was my first attempt at quilted stitches, I used stash yarn.
It was a bit hard for me to keep track of the pattern and I know I made at least one "design element". But I like the outcome so much that I'll probably make another and choose some prettier colors. This one reminds me a little pineapple!
Yarn: Bernat Soft 'n Cozy
Needles: #7's
I was a test knitter and I thought this was a fun hat with all the patterns going on.
I plan on making more.
1003 pairs of mittens/gloves/wristers were were mailed last week to the Rez!
Simply amazing, isn't it? What one group of people can do when called to the challenge!
Now back to our regular programming.... digging out the WIPs
Found two more hats in the WIP pile.
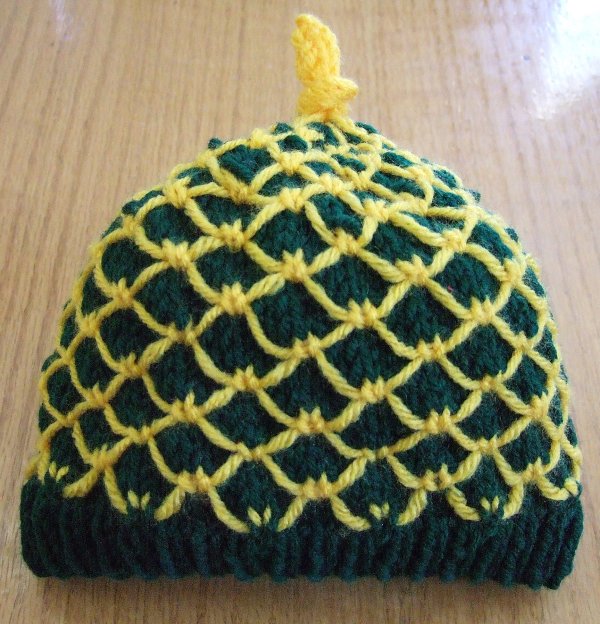
Hat #23
Pattern: Slip Stitch Quilted Baby Hat by Shelly KangIt's a Ravelry Download too. $5
Since this was my first attempt at quilted stitches, I used stash yarn.
It was a bit hard for me to keep track of the pattern and I know I made at least one "design element". But I like the outcome so much that I'll probably make another and choose some prettier colors. This one reminds me a little pineapple!
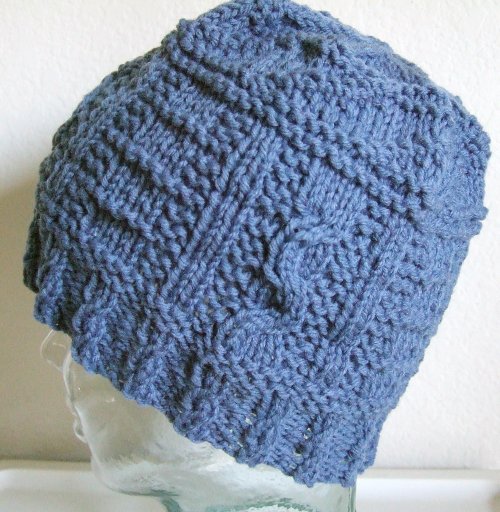
Hat #24
Pattern: Gansey Hat by GailYarn: Bernat Soft 'n Cozy
Needles: #7's
I was a test knitter and I thought this was a fun hat with all the patterns going on.
I plan on making more.
Monday, September 29, 2008
Getting Back To Other Projects
Rita's House Socks are done! The garter stitch sole worked out great.
I worked the afterthought heel on 20 sts, leaving 16 for the instep.
Hope they fit!
Here's the start of the Juliet Cardigan that I am knitting for my sis, Rita.
She saw the pattern knit up at her local yarn shop.
It calls for a gauge of 14sts per inch. Caron One Pound yarn and size 8 needles gave me the right gauge.
I spend yesterday catching up on some Tivo'd shows and working on putting together the small granny square baby-ghan.
I'll have pictures soon.
Sunday, September 28, 2008
Keeping Track Of Hatz
And so I said I was going to go thru my knitting projects yesterday...
Guess what I found? Hatz! I had stored them away somewhere different from where I usually keep them.
So now I have all my hats to take pictures and I had a picture that included the 6 hats I mailed out last Friday.
I went back and looked at all my posts and photos in my computer and I've found out I have made a total of 44 hats since Jan 2008.
38 of these I've made for the Rez.
But wait! My sidebar says 22....
Looking back at my posts I see that I started counting for a Hat Blitz I thought was going to start soon.
I started with the yellow butterfly hat as #1
So thanks to BigHugeLabs, I made this mosaic of all my hats from 1-22
I think I'll take Lizzie's advice and bring down my finished hats to the computer area and COUNT them!
Meanwhile here are some pics of the latest hatz.
Tuesday, September 23, 2008
A Pair of Socks and Some Answers
Here's the house socks I've been working on. As you can see I've knit the place for the afterthought heel with black waste yarn.
Now to take care of the "I Love Your Blog" Award answers
I'm supposed to answer with one word whatever comes to mind first so here goes:
Now to take care of the "I Love Your Blog" Award answers
I'm supposed to answer with one word whatever comes to mind first so here goes:
The questions are as follows:
1. Where is your cell phone? Charging
2. Where is your significant other? Recliner
3. Your hair color? Brownish
4. Your mother? Deceased
5. Your father? Deceased
6. Your favorite thing? Knitting
7. Your dream last night? None
8. Your dream/goal? Many
9. The room you’re in? Small
10. Your hobby? Numerous
11. Your fear? Seldom
12. Where do you want to be in 6 years? Alive
13. Where were you last night? Bed
14. What you’re not? Slender
15. One of your wish-list items? HDTV
16. Where you grew up? California
17. The last thing you did? Knit
18. What are you wearing? Cothes
19. Your TV? Off
20. Your pet? Neutered
21. Your computer? On
22. Your mood? Impatient
23. Missing someone? Yeah
24. Your car? Red
25. Something you’re not wearing? Socks
26. Favorite store? Home Depot
27. Your summer? Fun!
28. Love someone? Yes!
29. Your favorite color? Red
30. When is the last time you laughed? 10:58
31. Last time you cried? Forgot
And that's it for today because as you noticed, my mood is impatient!
Saturday, September 20, 2008
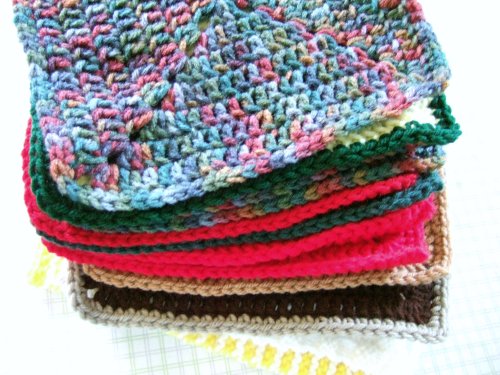
Square-Mania
I've been crocheting and knitting up 9" squares and now I have a little leaning tower of squares! They're waiting for company - more squares from our group.
The top square is the basics solid granny square pattern I use.
There is a YouTube video that shows how here.
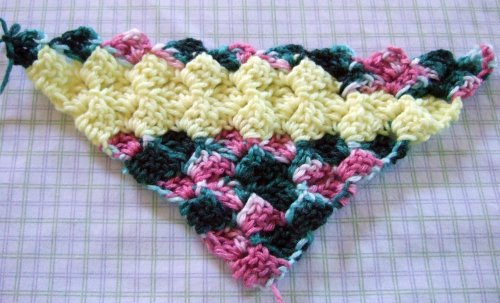
Now Lizzie has made quite a few blankets already and she just finished a crocheted Box Stitch Diagonal one.
The other day at the LA County Fair, I saw a lapghan crocheted in Box Stitch Diagonal. It was just odds and ends with black sc around the edges.
So I've decided to try my hand at this stitch. Funny thing is that I've made an afghan or two using this stitch, but many, many years ago. So I am glad there are tutorials to help refresh my memory.
I decided to just make a 9" square for practice because I do not have enough yarn for a lapghan or baby blanket.
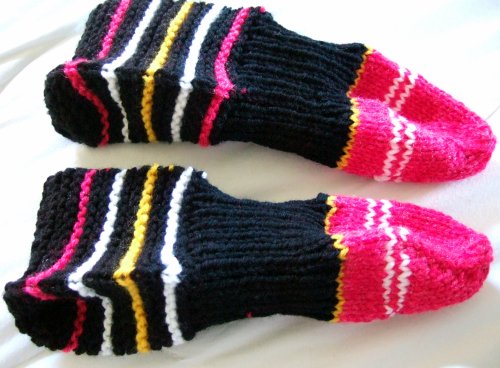
Rita's Slippers Are Done!
PDF Pattern: Mountain Form Slippers
Yarn: Worsted wt stash odds and ends
These were fun to make, but I am not sure I like the ribbing part. I suppose it holds the slipper snug to the foot. I'll have to ask Rita how they wear.
I was thinking next time I could just do them on straight needles and crochet the seam closed on top, like a planned embellishment.
Friday, September 19, 2008
Changing Gears
Update On The Blanket Blitz
Now through January 15, 2009, our Yahoo NAS Group will be making
4" knit or crochet squares in BABY COLORS ONLY, sport or worsted acrylic yarn
and/or
9" knit or crochet squares, any colors, worsted acrylic yarn
We will be sending all squares to:
NAS Blanket Blitz
19510 Van Buren Blvd.
F3-361
Riverside, Ca. 92508
I will be one of the "assemblers" having fun joining up all the squares to make blankets.
We have a blog too, showcasing blankets, squares, tips, etc.
Native American Support Blanket Blitz
If you prefer to make a complete blanket, afghan, quilt, laprobe - that's great!
February 1, 2009 is the final date to send completed afghans, quilts and blankets for babies through adults, knitter's choice (please label all wool blankets).
Send the completed blankets to the "Main"
Julie Garreau-Project Director
Billy Mills Youth Center (The Main)
8200 East Lincoln Street
P O Box 410
Eagle Butte, SD 57625
I've been working on several blankets and lots of squares. One of my projects is a hexagon blanket. I've even got my sis Rita, crocheting little hexagons for me.
Here's a big shoebox full that she sent.
The plan, once we coordinated our finished hexagon diameter, is to connect them with white. That should be a pretty colorful blanket.
When I get around to joining them, I'll post the progress and some links on how to join.
Mittenz
I've finished my last pair and have to take pics, finish filling the box and pack and ship. It really does give me a very happy feeling to know that there will be more warm hands and heads at the Rez this winter.
Other Projects
I finished that small baby hat and it is small - infant sized.
Lizzie said I should have cast on 80 sts and next time I am going to do just that!
One pair of slipper socks are finished and I'm doing great on the other pair on two circs.
That's all for today as I am resting up from all the walking I did yesterday.
We went to the LA County Fair. Fun, but oh so tiring....
Monday, September 15, 2008
No Blogging - Lots of Knitting
No Blogging lately - what's wrong with me?
I've been real busy tending to the forgotten backyard. It was a jungle back there but I've now gotten it manageable again.
My computer was having problems, my hard drive died. Put in another one and now I have to install all my programs again. I'm still not finished and now my photo editing software is not working for me.
I decided to use Flickr's Picnik program. So far it's OK.
My sis Rita sent me her favorite slipper socks to mend. I usually do afterthought heels and tell her to not throw them away when she wears a hole in the heel.
I can fix them! I did fix them and decided to knit her up a few more pairs.
Some nice reddish ones.
Yarn: TLC Essential Multi - Sedona colorway
Size 4 needles - working both socks at the same time.
Pattern: Melanie's House Socks
I've made a pair of these before and really liked the garter stitch sole.
With this pair I am going to work an afterthought heel instead and still keep the sole in garter stitch.
Here is another pair I'm making using up all the bright bits of yarn.
PDF pattern: Mountain Form Slippers
Mittenz Update
Time is quickly approaching the mail date! I have about 72 pairs of mittens made.
I was saying I was trying to knit up 100 and I will for the year of 2008, just not for the current Blitz. Besides my mitten box is almost full.....
I've got a few more photos but I'll save them for tomorrow.
Oh and Linda nominated me for "I Love Your Blog Award" Thanks!
I'll see what I can do about answers......
Wednesday, September 03, 2008
The Knitting Factory Is Open
I knit up this car seat blanket so fast, I amazed myself! Of course it is only about 24"x31" - but still, you know how slow I go on blankets in the summer...
I used Mason Dixon's Moderne Baby Blanket but cast on fewer stitches and added a few more strips.
This will be for Little Lissie - matches her little hat :)
Yarn is Hobby Lobby's I Love This Yarn.
WIPs
I like to clean up my craft room when I go away, so I tend to shove all the WIPs here and there - out of sight. Now that I am back, I am having fun searching for them because I forgot where the heck I hid them!
Found the Telemark Sweater and finished it in no time. This one is destined for the Rez for the coming winter.
Pattern: Telemark Sweater (Free Ravelry Download)
Needles: #7's
Yarn: Thrift Shop
Now to hunt around for more FO's and those mittens I left to be finished.
Yes, I am back to knitting even more mittens! Maybe I can reach 100 pairs before the end of Sept? Nahhhh...... not even if I knit in my sleep :)
Thursday, August 28, 2008
It's Been Awhile
Well it's been awhile since I've last posted. I am back home again and trying to resume a regular schedule.
It's hard. I miss my Colorado family.
Lots of chores around here too. My backyard is a jungle of weeds, my wips are lying around, abandoned, my desktop power supply died, now the cpu fan is making strange noises and that is not good. Oh and I need to look for a car.
Good thing I have my summer shows Tivo'd. I have been knitting a car seat blanket, using Mason Dixon's Moderne Baby Blanket pattern. Lots of garter stitch to watch the shows.
Here's a cute crocheted hat I made for little Lissie. Added the flower for even more cuteness!
Subscribe to:
Posts (Atom)